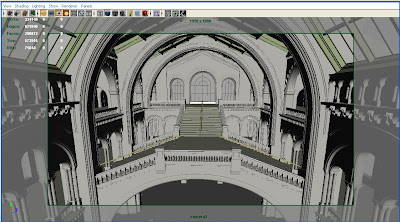
This tutorial describes how to fake GI by using lights in Maya software renderer, means we are going to simulate occlusion shadows within the Maya. For this I used a set available in www.3drender.com, you can download from http://www.3drender.com/challenges/index.htm . open the scene and set a camera to match the view like this.
set the render settings as resolution 1920*1080, preview quality with raytrace off. We are going to use only depth map shadows. lets start the lighting. First we need to set sun light/key light by using directional light. create a directional light. adjust the light to cast afternoon kind of shadow.( usually afternoon shadows are short in length and very krisp. These should be 1:0.75 in length comparative to the object length. directional light settings should be like this..
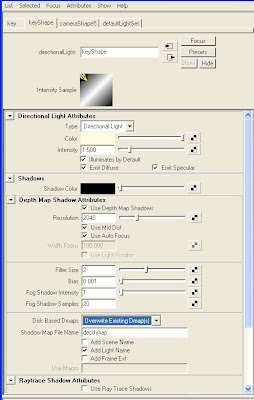
match key direction to this image
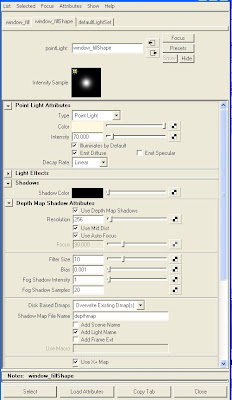
Now setup lights to get soft occluding geometry shadows on the front side wall. For this use point lights with dmap shadows with high filter size. These light attributes should be like this.
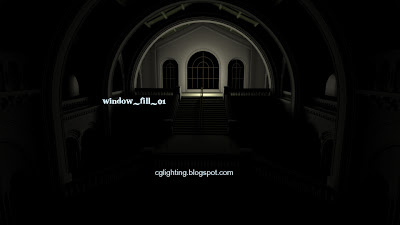
and render should be like this
set three more fill lights with same settings and change decay rate accordingly after setting up all the key lights the set should look like this.
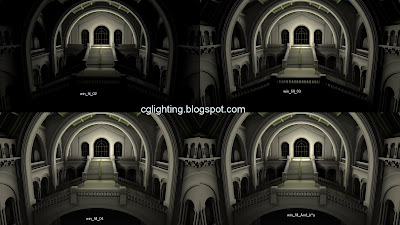
Now you can see soft occlusion kind of shadows on the occluding walls archs etc..
And this method is useful whenever you light and render heavy BGs with complex geometry. You can save lot of time against mentalRay Ambiant occlusion caliculation. I rendered full HD resolution(1920*1080)in less than 3 minutes!
Saturday, July 25, 2009
Monday, July 13, 2009
COMPOSITING KEY SHADOW ON GROUND
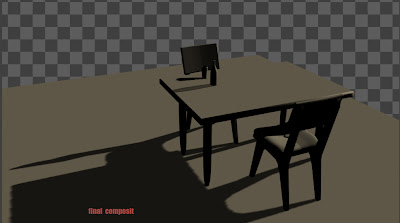
This is a simple tutorial explains you to how to composit a key shadow over a groung/floor. I used maya software render for the shadow rendering and used digital fusion for compositing. Now the task is to match renders with this below given image...
in this image I used two different types of shadow types for table and the bottle. Bottle has transparency so I used raytraced shadows and for tabel I used regular Dmap shadows. If we use same raytraced shadows for the entire set that will drastically reduce system performance. Flexibility of multipass rendering allows us to handle this situation. Lets prepare maya scene for rendering. In this scene I used simple geometry from the noted kitchen set of Jeremy Birn. just keep two chairs, a table and floor like this...
Let we start creating render layers in Maya. first select floor object and create a render layer. return to master layer select table and chairs then create another render layers rename it as table and chairs. Now select table chair and floor, rename it as "key shadow_table". select table top rename create render layer and rename it as "bottle_shadow". Let render the scene. Floor layer should look like this. add appropriate lights for the render layers to cast the shadow. Just re-check the render layers.
1. ren_floor
2. ren_bottle_shadow (apply usebg shader for table_top and switch off primary visibility for bottle and glass objects, turn on raytraced shadows for the light)
3. ren_floor_shadow (apply usebg shader for floor and switch off primary visibility for table and chairs).
4. ren_table_and_chair
5. ren_bottle_and_glass
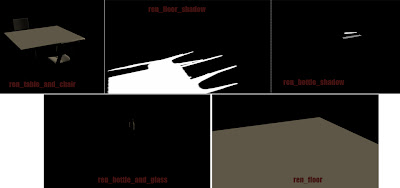
after rendering each layer output should look like this.
Now its time for Fusion.
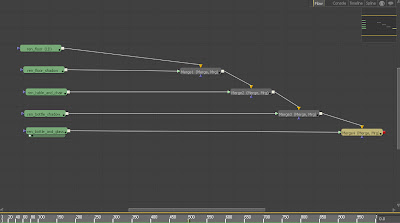
Construct flow in this order.
ren_floor+ren_floor_shadow+ren_table_and_chair+ren_bottle_shadow+ren_bottle_and_glass.
and Fusion flow should look like this.
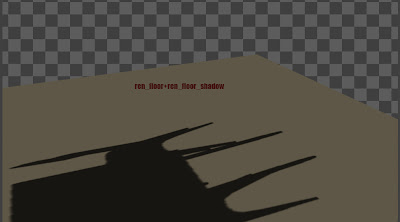
And each merge from the top should give result like this...
Thursday, July 2, 2009
DIGITAL FUSION---EXTRACTING ALPHA WITH CHANNEL BOOLEAN
We usually use channel boolean to cut get an alpha channel out of a rgb image. for this we need one alpha channeled image in extra to the rgb image. This tutorial shows you to extract alpha channel from a rgb image. here we have images of a BG and a character without alpha channel and one character image with alpha channel. Now with this image you can cut the charter alpha channel(usually it is available in master beauty pass if you are rendering with multipass render) and apply it on bg in order to composite the bg and character together. we have footage of bg split into AO pass and color pass. character footage in one image without alpha and another with alpha. Now construct the flow. first add bg AO and Color with multiply apply mode. drag a channel boolean node from the tool tab to flow area connect its background connection to the character image without alpha. again connect its foreground connection to character image with alpha. Now merge this connection with bg merge. Now character and bg will be composited. character stays on BG! follow the below images to understand the "channel boolean" tool and the construction of the flow.
channel boolean tool settings.....
channel boolean connections....
the final final should be like this....
channel boolean tool settings.....
channel boolean connections....
the final final should be like this....
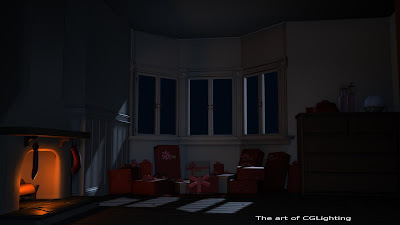
LIGHTING AN INTERIOR SET
Now the task is to match this image's look and feel. This interior scene modeled by Jeremy Birn. This scene contains only shader colors and no textures at all. We are going to lit it with maya using maya software in single pass. timing is Night.
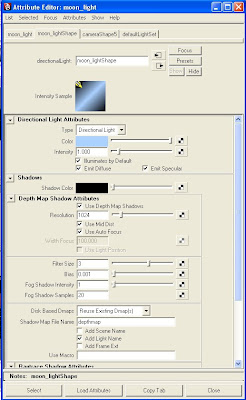
First you should set the key direction. this is night lighting so we use cool moon light as our key. for this I used direction light as the key. Edit key lights attributes to match this settings....
adjust the key position like this and you should get the render like this image.
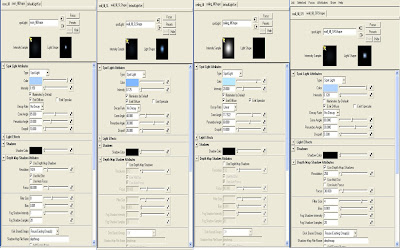
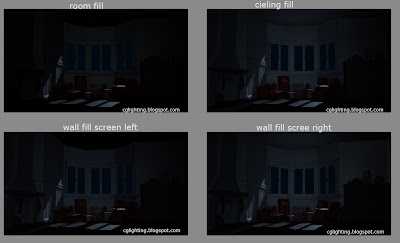
Now set fill lights for wall, ceiling, and room. and settings for all the fill lights are shown below...
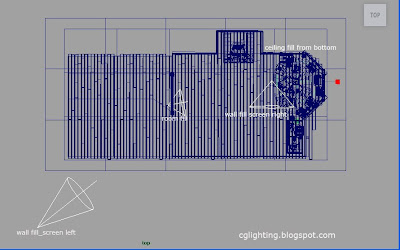
adjust the positions accordingly. The final position of the fill lights for wall, cieling and room should look like below given image.
and the renders should look like this...
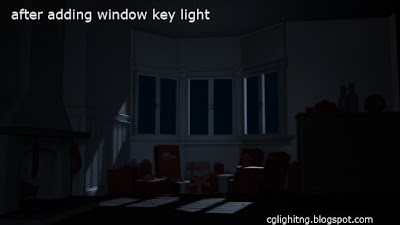
now add a window key light to illuminate the window sides showing the key, use a point light with no decay and put a cool color with intensity of 0.750, dmap shadows on with dmap resolution of 1024 and sample 10.
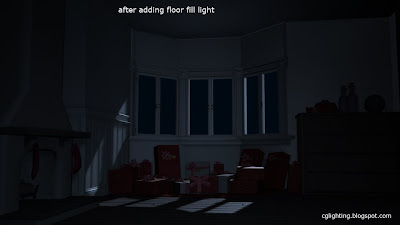
Now add a fill light for floor. with settings of intensity 0.175, color cool blue, cone angle 120, dmap size 256 with sample 8, dmap focus 50. match with this image
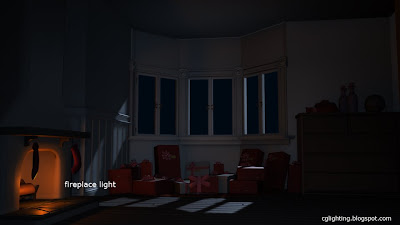
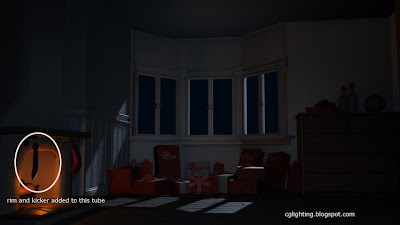
add one rim light for chimney with 0.2 intensity. leave rest of the settings to default. Add a fire light(a point light) and place in to the fireplace area with warm orange color with settings of intensity 8.750, decay-linear, dmap size 256, filter size 10. match render to this image.
now add lights for fireplace's stacking tubes
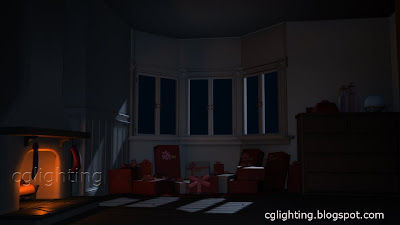
now fine tune rest of the objects by adding appropriate rim fill and kicker lights. and the final image looks like this.
DIGITAL FUSION TOOLS --- CHANNEL BOOLEAN
channel Boolean helps us to extract a particular channel of our choice. It exactly works like "sets" in mathematics. if you have 3 channels RGB combined in an image without Alpha channel then you can extract alpha channel from the available color information channels. below picture shows visual information about this tool.
Subscribe to:
Posts (Atom)