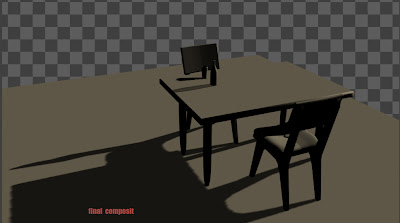
in this image I used two different types of shadow types for table and the bottle. Bottle has transparency so I used raytraced shadows and for tabel I used regular Dmap shadows. If we use same raytraced shadows for the entire set that will drastically reduce system performance. Flexibility of multipass rendering allows us to handle this situation. Lets prepare maya scene for rendering. In this scene I used simple geometry from the noted kitchen set of Jeremy Birn. just keep two chairs, a table and floor like this...
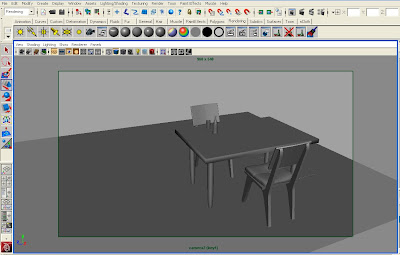
Let we start creating render layers in Maya. first select floor object and create a render layer. return to master layer select table and chairs then create another render layers rename it as table and chairs. Now select table chair and floor, rename it as "key shadow_table". select table top rename create render layer and rename it as "bottle_shadow". Let render the scene. Floor layer should look like this. add appropriate lights for the render layers to cast the shadow. Just re-check the render layers.
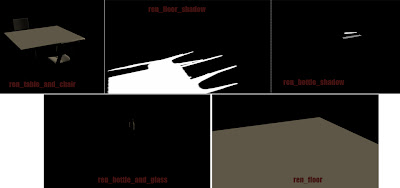
1. ren_floor
2. ren_bottle_shadow (apply usebg shader for table_top and switch off primary visibility for bottle and glass objects, turn on raytraced shadows for the light)
3. ren_floor_shadow (apply usebg shader for floor and switch off primary visibility for table and chairs).
4. ren_table_and_chair
5. ren_bottle_and_glass
after rendering each layer output should look like this.
Now its time for Fusion.
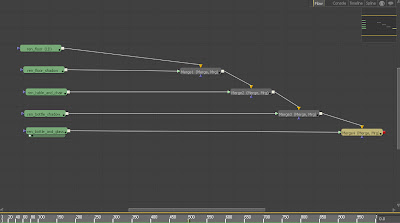
Construct flow in this order.
ren_floor+ren_floor_shadow+ren_table_and_chair+ren_bottle_shadow+ren_bottle_and_glass.
and Fusion flow should look like this.
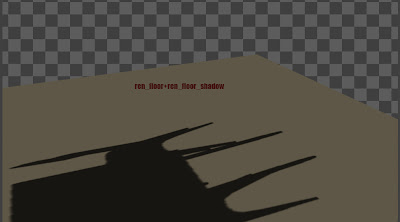
And each merge from the top should give result like this...




No comments:
Post a Comment