Hey guys let we explore new lighting features in MAYA 2009. Here is a simple tutorial using MAYA-DIGITAL FUSION. This tutorial based on the newly introduced render passes in lighting. The task is to match the look and feel of this image.
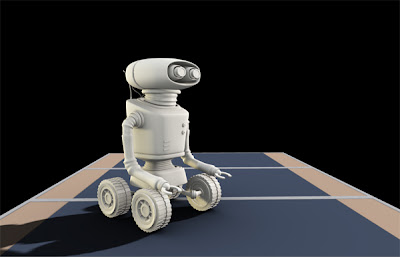 modeled by Juan Carlos Silva.
Maya 2009 allows us to render our scene in to multiple passes like Ambient Occlusion,
diffuse material color, specular, shadow, indirect, incandescent, translucence, indirect etc.. this method gives us greater comfort to fine tune the output quality in post by using softwares like Fusion,shake, AF etc.... let we start lighting.
Maya scene looks somewhere like this
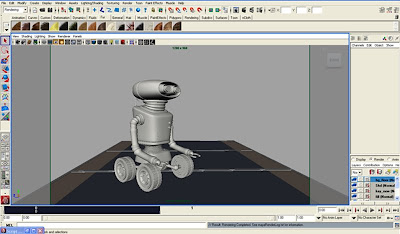
Now create render layers for floor,occlusion,key,fill,rim,shadow and topfill.
after creating all the render layers your layer editor should look like this
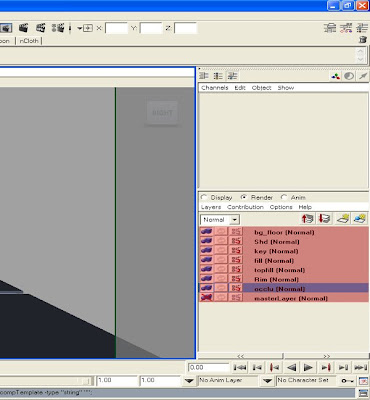
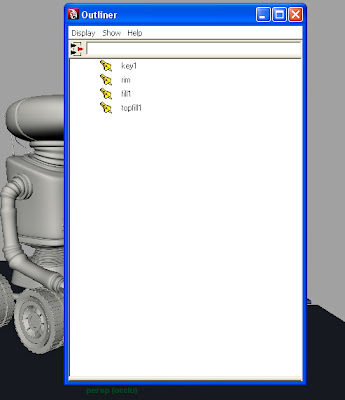
Use four lights key,rim, fill and topfill. add each light into its respective render layer.
Now the important task adding passes to layers. Make sure that mental ray selected in render using option in your render settings tab. it should look like this...
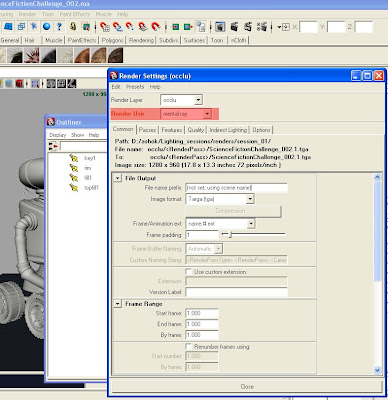
in extra to light passes our character needs one occlusion pass. light is not required for occlusion pass. to get the correct occlusion you have to make some changes in the render settings window. first go to the passes tab and click on create new render pass button, this will open a another window contains different render pass options. choose AO, diffuse material color passes form the window. like this.
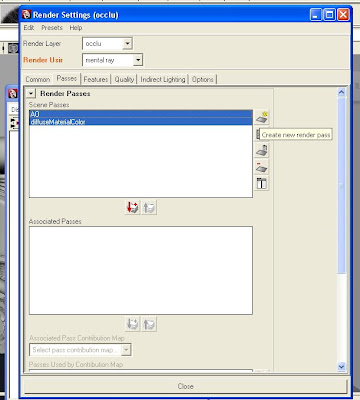
after creating render passes in order to render with the particular render layer we need to associate that pass with render layer by adding the render passes in to associate passes window. Now its time to set the values for Ambient Occlusion calculation. Ambient Occlusion option is available in indirect tab. opt for final gathering and Ambient Occlusion set the final gather accuracy 100 and rays 512 in Ambient Occlusion. like this
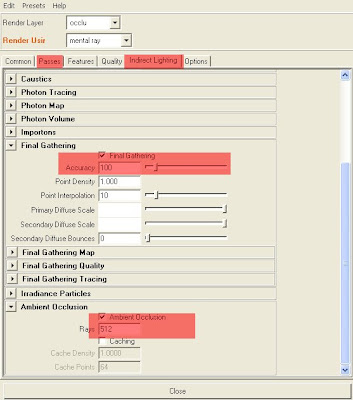
for all the light passes choose maya software as renderer.Be sure every renderusing option must be overrided.(except for key we need specular pass for the key light) for key light add only specular pass. render key shadow on the floor as a seperate pass. for this select character and floor create a render pass rename that render layer as "Shadow". assign use background shader to floor. select the robo and go to the attribute spreadsheet window switch off primary visibility and recieve shadow options in the render tab.finally add key light in this render layer. select all the floor items and switch off cast shadow option. this will give you rendered shadow in alpha channel. adjust the light positions as required by the scene. turn on the shadows for each and every light. now its time to render. set appropriate project directory and render single frame using maya batchrender. It gives images like this.
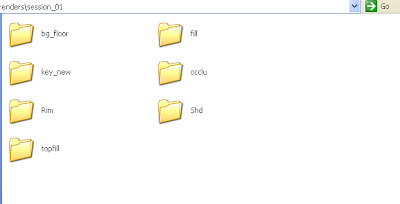
and all the passes looks like this image.
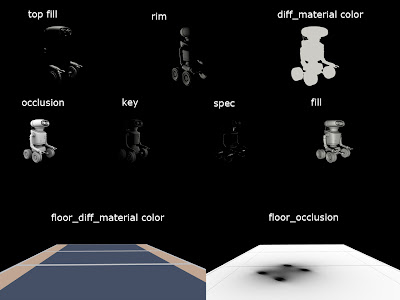
now its time for compositing... open digital fusion and import all the images into.
start with char_diffuse material clor connect to occlusion node and choose multiply in apply mode option. like this
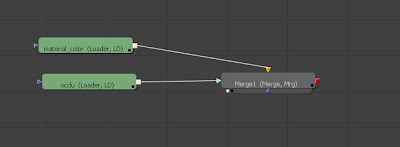
keep on constructing the Fusion flow... and final flow should look like this.
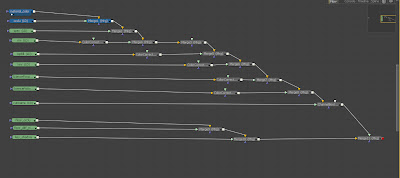
and your final image in fusion will look like this.
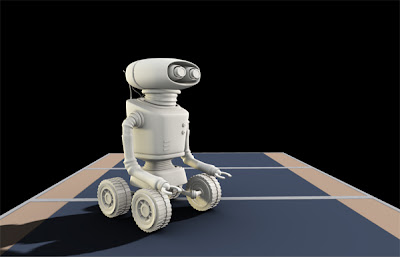
so this is the basic workflow for Maya 2009 render passes. practice it and enjoy. if you have any doubt just mail me on "cglighting@gmail.com"... more tuts are on the way coming soon keep visiting my blog.
 After a long time (near about 7Years) I tried to lit a scene in 3ds Max. I took neutral (only blin with no speculars) shading exterior set and started afternoon lighting with default scanline render. The set looks like this without any lights.


 Posts
Posts


