EXTERIOR SET LIGHTING WITH 3DS MAX
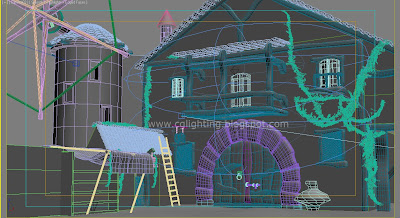
After a long time (near about 7Years) I tried to lit a scene in 3ds Max. I took neutral (only blin with no speculars) shading exterior set and started afternoon lighting with default scanline render. The set looks like this without any lights.
Start with one freeDirectional light to simulate Sun. with settings shdows on with shodow map shadow options. ">


change the bias to 0.05(by default 3dsmax renderer calculates shadow bias as 1.0 but this value takes shadow out from the origin. like this image.
this image shows corrected bias value for this set. so the shadows will stay at the origin of the geometry. This occurs because of the shadow map calculation by scanline render. It creates a 2d map of the geometry from light's view. bias value controls the placement of the shadow map.
Now we need to add a fill light to eliminate the darkness created by keyshadows. for this I used a freeSpot light with values like this and position that light somewhere around opposite to the sun light direction.

and render output with fill light and sun light looks like this

Now back side of the set is too dark and fill light is not reaching there. So create a point light and include only that surface to the light illumination and shadow parameters and the light settings should be like this; use inverse square as the decay rate. it restrics light to a limited distance. by default all the cg lights comes with infinite range. we can control with decay and attenuation parameters. Rendered image with fill light added for the back side of the set should look like this


Now we will start adding more lights for detailing and simulating the bounce of the sun.add bounce for the balcony. usually in midday noon time bounce is more and it bounce the texture/shader color of the nearby geometry since we have only gray color shading so the light bounces with default sun light color. these are the settings for balcony bounce light. I used a omni light as the bounce light and included only balcony base geometry to lights illumination and shadow parameters ( include and exclude parameters are similar to Maya make/brake light links attribute). light settings are like this;

and the rendered image should look like this

Now balcony top fill...

Now adding bounce light for fabrik in the foreground with a free spot positioned from the bottom with this settings....

and render out put is like this....

Now add details to pillars by using free spot.(spot lights are more orthodox lights with less render time, I encourage the usage of spot lights more often)when ever you get confused with which light illuminating which geometry you can simply unchek the lights in lightlister(cool tool in 3dsMax) and chek the individual lights illuminating geometry! render output with added details to the pillar.

Now start adding details to the wooden rack in the foreground. with usual spot lights. this is the render output...

Now small pillar in the background.

Fabrik key in order to match sun illumination.....

Bounce light for Small balcony right side of the set.....

after adding global fill for floor and fill for backside geometry.. the image should look like this.

 After a long time (near about 7Years) I tried to lit a scene in 3ds Max. I took neutral (only blin with no speculars) shading exterior set and started afternoon lighting with default scanline render. The set looks like this without any lights.


1 comment:
Great tutorial..
Exterior worl is really good.
http://www.yantramstudio.com/3d-architectural-exterior-rendering-cgi-animation.html
Post a Comment